


With the coming to the soft roof market, this material became popular in the construction of private houses. Excellent characteristics of the roofing material and positive feedback led to the fact that this product has become used in many regions of the country with different climatic conditions.
As one of the best roofing materials, soft shingles, or as it is often called, asphalt shingles, has very few shortcomings and meets all the wishes and requirements. Why do people prefer soft roofing?
Asphalt shingles is the most common type of roofing material. It contains a base asphalt and mineral granules. Asphalt shingles are easy to install (in this material we will tell you exactly how). That’s why it’s a good variant of a roofing material for a house.
Basic information
There are no difficulties in installing asphalt shingles if you follow certain instructions and have small construction skills. Properly laid asphalt shingles offer strong protection of the house from the weather and an excellent appearance of the roof itself.
The shingle sheets are nailed to the substrate and have specially prepared adhesive surfaces and strips which ensure that the shingles are laid flat. The coating remains airtight and resistant to strong winds.
In addition, the asphalt shingles roof is fireproof. If there is a spark from a chimney or direct contact with fire, the coating will not ignite. In addition, it is a lightweight material that does not create additional pressure on the house.
Advantages of asphalt roof shingles:
- Installation of roofs with complex configuration;
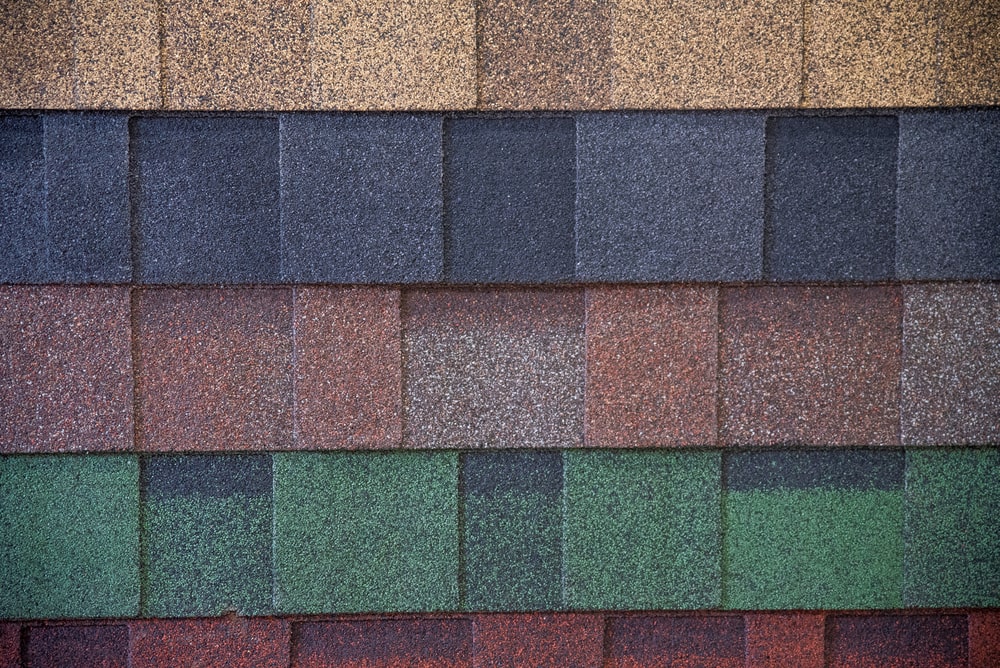
- A wide range of colours and shapes;
- Ease of renewal. A new layer of shingles can be laid on the old surface, without spending money on dismantling;
- Economy. Waste during installation will be kept to a minimum.
Disadvantages:
- Premium architectural styles are more expensive than basic 3-lane shingles.
- Asphalt shingles will destroy over time due to sun exposure.
- Base tiles are more prone to impact (hail) damage than higher quality asphalt tiles.
Asphalt roofing varieties
In the past, asphalt tiles had two varieties: organic and fiberglass. However, due to the asbestos concentration, the demand for organic roofing has been reduced to a minimum. GRP shingles include fiberglass, the coating of which was developed to replace the old asbestos-based roof.
In the manufacture of asphalt shingles, fiberglass mat is combined with phenol-formaldehyde resin and asphalt mixture, which includes chemical additives to better combine the two materials. In the final stage of production, the outer layer of shingles is covered with ceramic granules, which are one of the most important components of the asphalt surface. The granules protect the shingles from ultraviolet radiation.
To protect the coating from the growth of algae and fungus in the granules are present elements of zinc or copper. Metal chips prevent the appearance of any organics on the roof in the first 10 years.
Three-layer shingles have a rectangular appearance. It is thinner than other types of roofing, which makes it a budget option. In southern regions, as well as in regions with rapid temperature changes, triple-layer shingles are susceptible to maximum wear and tear and can not stand the warranty period. For this reason, this type of shingles is unpopular.
Architectural shingles (sometimes called “laminated” shingles) are three-dimensional by connecting two or more shingles. This type of coating is much stronger than three-layer shingles. Because of the connection of several elements architectural tiles are heavier and more resistant to weather factors. Primarily, the installation of such shingles is carried out with a lifetime warranty.
The service life of any asphalt shingles varies depending on the quality of the material, but the key to durability is correct installation.
How to Install Asphalt Shingles

Independent installation of new shingles will save you time and money, moreover, you can do it professionally. Replacing shingles on your roof can help keep your home in good condition, protect your family and roof structure elements. Learn how to prepare your roof for shingles, take courses and install shingles as well as professionals.
Part 1 Roof preparation
- Purchase the right amount of shingles for your work. Three packs of shingles are usually required to cover 100 square feet (9.29 square meters). Shingles are usually sold in packs of three. Measure your roof and buy the amount you need. Measure the length and width of the individual sections of your roof by multiplying them. Add up the individual sections and then divide the amount by 100 to get the right number of squares. Multiply this number by 3 to get the number of packs you will have to buy.
- Measure the length of tiles with a tape measure, determine how the tiles will lie on the roof. Most shingles are 3 feet (91.4 cm) long. If your roof width is not a multiple of the length of shingles, you will need to trim the last shingle at one end of each row. When laying the bottom row of shingles, you should stick to the roof edge. For a wooden roof, you will need to cut off the shingles that extend beyond the edge to create a straight line during the installation.
- Remove the old tiles and the edging (metal strips and terminal seals). Start removing the shingles from the edge of the roof or from the corner furthest away from the dumpster. To remove old shingles quickly, use a garden fork or a roof shovel and use a hammer for more thorough cleaning. Remove nails and loose ridge elements. It is normal that if you do not remove all the nails at once, you will have the opportunity to go back and remove them. Remove the metal border around the pipes, vents and chutes from the roof. The trim in the troughs will almost always be severely damaged. Some roofers leave a trim that is in good condition, but it is better to throw it all away if you have the chance.
- Clear the roof. Remove the garbage from the roof as thoroughly as possible. Remove nails that have not been removed before. Fix the boards that are loose. Inspect the battens for damage and rotten boards and replace damaged areas.
- Install the underlay carpet and new trim. Place tarpaulin, felt paper or special waterproof underlay over the roof. Some roofers will use a 15 pound (6.8 kg) roofing felt, which is an effective method. Do not spare staples when attaching felt to the roof. Use “tin covers” under the staples if the roof can be damaged by wind. Use adhesive tape as a protection against ice and water as a bedding in places where water and ice are likely to enter, in places where there are troughs and where the roof comes into contact with the wall (a wide metal trim can also be used there).
- Install a new trim. Nail new trim along the outer edges of the roof. Run a chalk line 7 inches (17.8 cm) from the edge of the bottom. Draw a line from left to right edge of the roof so that it is immediately visible above the next row as a guide. Continue drawing additional lines for at least 4 more rows through the roof.
Part 2 Installation of triple petal shingles
- Get the petals ready, put the front row down. Cut the petals from the beginning (bottom row) of the shingles for a special occasion to begin with. You will lay shingles above this layer so that the bottom layer is twice as thick. Instead of trimming the 3 petals, you can install shingles so that the inner layer of shingles is facing under your first row. Using another method, apply a hard edge to the eave by cutting off six inches from the length of the outermost (zero) row of shingles, which will prevent the slits from overlapping in one row so as not to leave bituminous paper open through the slit in that lower row. When nailing cornice shingles (shingles without petals), apply bitumen glue by applying a continuous line along the edge of the cornice with a gun, then press a piece of shingles along the application line of bitumen glue. A continuous layer of bitumen glue will protect the roof from condensation, wind and water.
- Cut five sheets of shingles of different lengths for the curtain rooftop. To make sure that you have the correct dimensions and markings, cut out a few of the three sheets of shingles you bought. Cut half the width of the first sheet of shingles to start the first row. Each cut must be shifted 1/2 of the petal width to offset the grooves on the top and bottom of the shingles. Store all waste, especially all single petals for use on roof ridge. Perform the following shingle adjustment:
- Cut off half the petals for the first row of shingles;
- Cut a whole petal for the second row of shingles;
- Cut a petal and a half for the third row of shingles;
- Cut two petals for the fourth row of shingles;
- For the fifth row you need half a petal;
- For the sixth row of petals, we do not cut off.
- Start laying rows. Nail the cut-off sheet of shingles in place about 15 centimetres from its bottom edge. Place one nail approximately 5 centimetres from each edge of the batten and a second nail approximately 2.5 centimetres above each notch. The next tile above should cover the nails approximately 2.5 centimetres vertically. Horizontally, the end nails will be covered by shifting by ½ the width of the leaf blade of the top row shingles. Make sure that the nails have secured the top edge of the shingles. Start laying rows. Nail the cut-off sheet of shingles in place about 15 centimetres from its bottom edge. Place one nail approximately 5 centimetres from each edge of the batten and a second nail approximately 2.5 centimetres above each notch. The next tile above should cover the nails approximately 2.5 centimetres vertically. Horizontally, the end nails will be covered by shifting by ½ the width of the leaf blade of the top row shingles. Make sure that the nails have secured the top edge of the shingles.
- Nail a whole sheet of shingles above the cut off piece. Repeat this process by placing the shingles all over the roof, laying the shingles from left to right, following the chalk line so that the shingles lie flat. Use 4 nails to attach a sheet of shingles, fasten the shingles to the windward side using 6 nails. Some local regulations require that a shingle sheet be attached with 6 nails throughout the roof area.
- Cut the last sheet of tiles to the size you need when you reach the end of the row. You can nail in first and then cut off the extra shingles. Continue this process five rows in a row and then start the same process again, similar to the first row, starting with an entire sheet of shingles and following the chalk markings. Repeat all the steps one after the other until the top. If it is a hipped roof, it is necessary that one sheet of shingles overlaps the next sheet of shingles on the roof ridge so that this joint seals the ridge.
Part 3 Installation of ridge tiles
- Perform the last action. Bend the last row of shingles above the ridge about 6 inches to the side and secure the shingles by bending them to the other side, covering the roof ridge with shingles, with nails covered with shingles, do not leave them open. Single-petal shingles (or ridge shingles) are intended for over ridge. Starting at the edge, place a roll of bitumen glue under the first sheet of shingles and hold the sheet of shingles. The nail heads of the bottom row will be covered by the edge of the next shingle with an overlap of about an inch horizontally and vertically.
- Place the tiles on the ridge. Smear with bituminous glue, from one edge to the other, fix the tiles with nails on both sides as before. Cut off the excess shingles when you reach the other end.
- Apply bituminous glue. Apply bitumen glue around the perimeter of the last row, around the nails. Apply the glue on the four corners of the ridge. Also apply bitumen glue to the nail caps, which are used to attach shingles to the ridge to prevent rainfall.
Tips:
There are also “petalless” shingles (with laminated layers of “wood”), not triple petal, but when laying it still requires the preparation of shingles with 5 different lengths. Before starting the installation of shingles, place the shingles packs above the roof so that the work flows without stopping.
The quality of the bedding material (bitumen paper) which acts as an additional waterproofing layer is very important for the roof.
Remove the protective film from the shingles, which keeps them from sticking together in the bundle if you want them to stick together well. This is most effective against hurricanes with wind speeds of about 60 miles per hour, both in tornado alley and on the bay coast. Removable protective film improves the adhesion on the back side and increases the width of the bonded surface. At least the strips should be removed from the windy side of the roof.
Some experts recommend starting in the middle of the row to allow two workers to work in different directions in one row to achieve a more balanced robot mode. In any case this is a good suggestion.
There is a smaller dotted line that is not always covered with plastic tape, which helps on the edge of the tiles, but the main sticky strip is 2 or 3 times larger, so it is stronger and should always be covered!
Warnings
“Cheap or fast” roofers do not remove the protective film from the shingles that covers the “sticky” area, as a result, the shingles do not hold and often break, and are deflated in strong winds of more than 40 miles per hour.
Warning: On steep roofs, metal strips must be nailed to hold you and construction scaffolding, as well as safety equipment.
Hot Weather: Do not attempt to install shingles and walk or stand on them during hot weather. This can cause damage to the shingles. It is possible to work half the day, starting early.